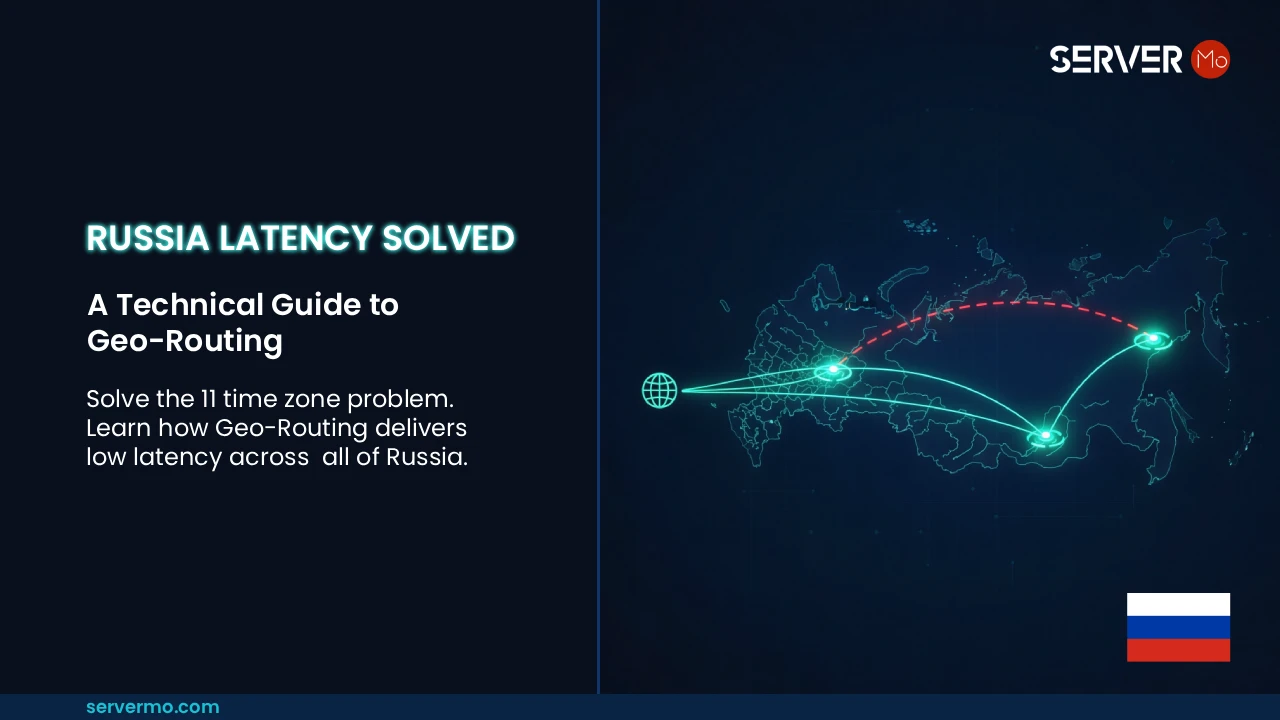
Introduction: The 11 Time Zone Problem
You want to launch your application, game server, or e-commerce store in Russia. It's a massive, high-value market. So, you do the logical thing: you buy a dedicated server in Moscow. Your application launches. Your users in Moscow and St. Petersburg are happy. But then, the complaints start rolling in. Users from Khabarovsk and Vladivostok (in the Russian Far East) are complaining about "unplayable lag," "slow-loading pages," and "connection timeouts."
You check your monitoring tools and discover the truth:
- Russia isn't one country; it's 11 time zones.
- The physical distance from Moscow to Khabarovsk is over 6,000 km.
- The speed of light doesn't care about your business. The minimum theoretical ping (latency) over that distance is over 100ms. In reality, with network hops, it's often 150ms+.
For gaming, streaming, or even a modern website, 150ms is unacceptably slow. You are losing customers in the Far East, just because your server is in the West.
This is the 11 Time Zone Problem.
Why One Server Will Always Fail in Russia
Most businesses make a critical mistake: they treat Russia like they treat Germany or France. They buy one server in the capital (Moscow) and expect it to serve the whole country. This graph shows why that strategy fails:
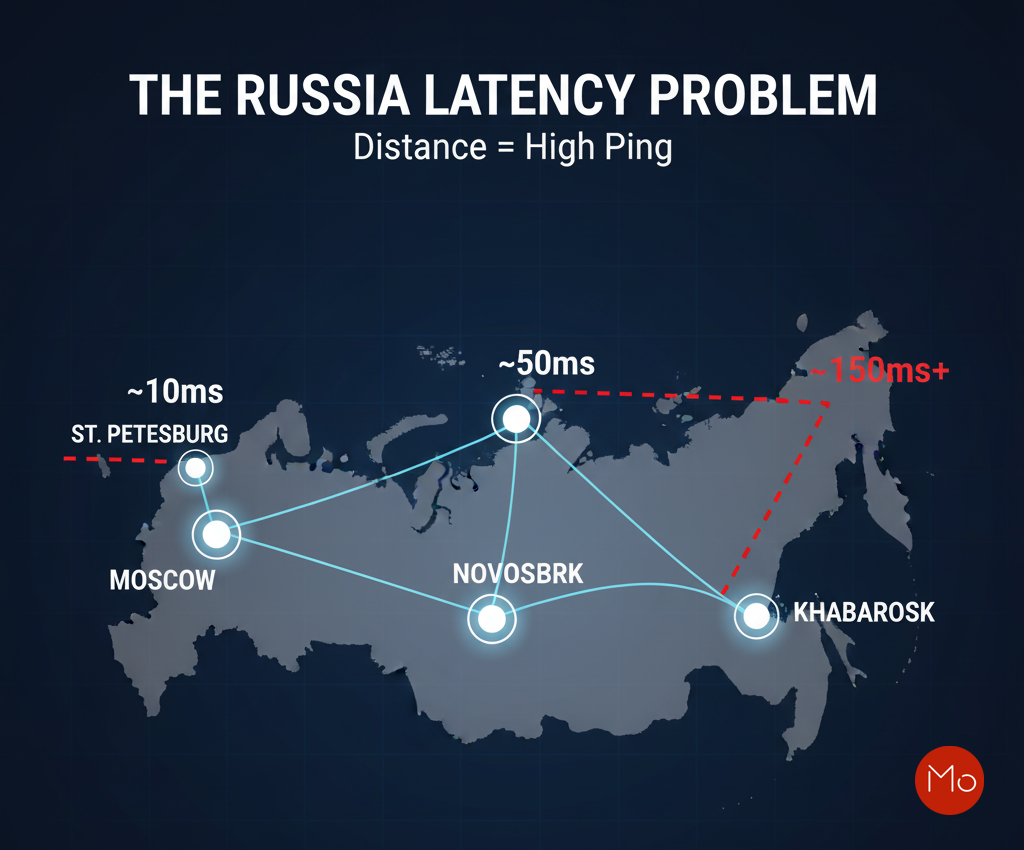
If your application needs latency under 100ms to be usable, a single Moscow server cannot serve all of Russia. You are forced to choose your audience: Europe or Asia. But what if you didn't have to choose?
The "Peak Level" Solution: Stop Thinking in "Servers." Start Thinking in "Strategy."
The only way to solve the 11 time zone problem is to stop relying on a single server. The solution is to do what global CDNs (Content Delivery Networks) do: place your data closer to your users. You need to deploy a multi-node infrastructure.
In this technical guide, we'll walk you through the exact strategy for achieving low latency across all of Russia. We will cover:
- The 3-Node Strategy:
Why Moscow, Novosibirsk, and Khabarovsk are the only three locations you need. - The Technology:
What is Geo-Routing (or Geo-DNS) and how does it automatically send users to their nearest server? - The Result:
How you can build a powerful, resilient network that gives all your Russian users a fast, sub-100ms experience.
This guide is for CTOs, SysAdmins, and developers who want to truly conquer the Russian market.
The 3-Node Strategy – Conquering Russia's Vastness
To truly achieve low latency across Russia's immense territory, you need a strategic approach that acknowledges its geographical reality. A single server is a liability; a multi-node setup is your solution. Our "3-Node Strategy" focuses on three crucial data center hubs that effectively cover the European, Siberian, and Far Eastern regions of Russia. These locations are:
Node 1: Moscow (The European Gateway)
- Location: Moscow, Western Russia (ServerMO Moscow Dedicated Servers)
- Why it's crucial: Moscow is the primary internet exchange point for European Russia and the CIS (Commonwealth of Independent States). It's the economic and digital heart of the country.
- Target Audience: Users in Moscow, St. Petersburg, and the entire Western/Central European part of Russia will experience ultra-low latency (under 20ms). This also provides excellent connectivity to neighboring European countries.
- Typical Use Case: Ideal for serving the largest segment of Russia's online population and acting as the main point of presence (PoP) for European traffic.
Node 2: Novosibirsk (The Siberian Bridge)
- Location: Novosibirsk, Central Russia (ServerMO Novosibirsk Dedicated Servers)
- Why it's crucial: Situated in the heart of Siberia, Novosibirsk acts as a vital bridge. It's too far from Moscow for optimal latency, but too far from Khabarovsk to serve the Far East effectively. It covers the vast, often overlooked, Siberian region.
- Target Audience: Users across Siberia, from the Ural Mountains to Eastern Siberia, will achieve excellent latency (30-60ms). Without Novosibirsk, this entire region would suffer from high ping.
- Typical Use Case: Essential for reaching the vast geographical center of Russia with speed, often serving as a secondary PoP for regional applications.
Node 3: Khabarovsk (The Asia-Pacific Window)
- Location: Khabarovsk, Russian Far East (ServerMO Khabarovsk Dedicated Servers)
- Why it's crucial: Khabarovsk is strategically positioned as Russia's gateway to the Asia-Pacific region. For users in the Far East (e.g., Vladivostok), a server in Moscow would be almost unusable due to extreme latency.
- Target Audience: Users in the Russian Far East, and importantly, neighboring countries like China, Japan, and South Korea, will experience significantly improved latency (under 50ms to local users). This unlocks a huge new market for your service.
- Typical Use Case: Indispensable for targeting the easternmost regions of Russia and expanding your service's reach into the lucrative Asia-Pacific market.
The Power of Combined Locations
When you combine these three strategic locations, you create a robust, distributed network that provides an optimal user experience across almost the entire Russian landmass. Instead of a single bottleneck, you have multiple, high-speed access points.
This is not just about having three servers; it's about having three strategically placed points of presence that minimize the physical distance to virtually every user in Russia.
The Technology – How Geo-Routing (Geo-DNS) Makes It Work
Okay, so you have three powerful dedicated servers: one in Moscow, one in Novosibirsk, and one in Khabarovsk. Now what? How does a user's computer in Vladivostok know to connect to the Khabarovsk server instead of the Moscow server? You don't want your users to manually pick a server. You need an automatic solution. This solution is called Geo-Routing, most commonly implemented via Geo-DNS.
What is Geo-DNS?
Geo-DNS (also known as Geo-Routing or IP Geolocation) is an intelligent DNS service.
A normal DNS server is simple: when a user types app.yourdomain.com, the DNS server always gives back the same IP address (e.g., your Moscow server's IP).
A Geo-DNS server is much smarter. When a user types app.yourdomain.com:
- The Geo-DNS service first looks at the user's IP address to determine their physical location (e.g., "This user is in Siberia").
- It then checks the rules you created.
- It gives the user the IP address for the server that is geographically closest to them.
How It Works: A Step-by-Step Example
Let's see how this works for two different users trying to access your service at app.yourdomain.com.
Your Geo-DNS Rules (Simplified):
- If user is in... European Russia ==> Return IP: 11.22.33.44 (Your Moscow Server)
- If user is in... Siberia ==> Return IP: 55.66.77.88 (Your Novosibirsk Server)
- If user is in... Russian Far East / Asia ==> Return IP: 99.88.77.66 (Your Khabarovsk Server)
- If user is in... Rest of the World ==> Return IP: 11.22.33.44 (Your Moscow Server - as a default)
| User 1: Anna in St. Petersburg |
|
|---|---|
| User 2: Viktor in Khabarovsk |
|
Both users typed the same domain name but were automatically routed to the server closest to them. This is the magic of Geo-Routing.
The Added Bonus: Automatic Failover & Load Balancing
This strategy isn't just for latency; it's also for reliability.
- Load Balancing: It naturally spreads your user traffic across three different servers, so no single server gets overloaded.
- Automatic Failover: You can set rules so that if your Moscow server goes down for maintenance, all traffic destined for Moscow is automatically re-routed to the next closest server (like Novosibirsk). Your users experience zero downtime.
This is how you build a resilient, high-performance network that can truly serve all 11 time zones.
Your 3-Step Implementation Plan & Conclusion
The theory is great, but how do you actually build this? Here is a simplified, step-by-step guide to bringing this low-latency network to life.
Step 1: Deploy Your 3-Node Infrastructure (The Hardware)
Your first step is to provision your physical hardware in the three strategic locations we identified. You will need three separate dedicated servers.
- For the European Gateway: Deploy your primary server in ServerMO's Moscow Data Center.
- For the Siberian Bridge: Deploy your second server in ServerMO's Novosibirsk Data Center.
- For the Asia-Pacific Window: Deploy your third server in ServerMO's Khabarovsk Data Center.
This combination gives you the perfect physical foundation to cover the entire country.
Step 2: Synchronize Your Application (The Software)
This is a critical technical step. You must install your application, game server, or website on all three servers. The main challenge here is data synchronization. How do you ensure a user in Moscow sees the same data as a user in Khabarovsk?
- For Websites/Apps: You might have a central database (likely in Moscow, which is your primary market) that all three nodes connect to.
- For Advanced Setups: For maximum performance, you might use a multi-primary database replication strategy (like a MariaDB Galera Cluster or PostgreSQL with BDR) to keep all three nodes in sync in real-time.
Step 3: Configure Your Geo-DNS Provider (The Magic)
This is the final step that makes the whole system work. You will need to use a third-party DNS provider that offers Geo-DNS or Geo-Routing services (like Cloudflare, AWS Route 53, or DNSMadeEasy).
- You will log in to your chosen DNS provider.
- You will create A-records for your three new server IPs from ServerMO.
- You will then build the "geolocation rules" we discussed in Section 3, telling the provider which IP to send users to based on their location.
Once you save these rules, the system is live. New users will automatically be routed to their nearest server, and you will have officially solved the 11 time zone problem.
Conclusion: Stop Choosing. Start Serving.
The 11 time zone problem is only a problem if you rely on 20th-century "single-server" thinking. By building a modern, distributed network, you no longer have to choose between serving your customers in Europe or your customers in Asia. You can serve everyone, everywhere, with the low-latency, high-performance experience they demand. This strategy—using strategically placed servers from ServerMO and activating Geo-DNS—is the most powerful and professional way to conquer the entire Russian market.
Ready to build your low-latency Russian network?
Start by exploring our strategic server locations.
Explore All ServerMO Russia Dedicated Server Locations Now Your Voice Matters: Share Your Thoughts Below!
 Recent Topics for you